A leading line is an edge or shape that gives your eye a route through a photograph. It might be a road, a shoreline, the curve of a stream or the edge of a table. It does not need to be straight, and it does not need to be the main subject.
The useful question is where the route takes you. A strong diagonal that points out of the frame can pull attention away from the thing you wanted to show.
Follow the edges in the canyon
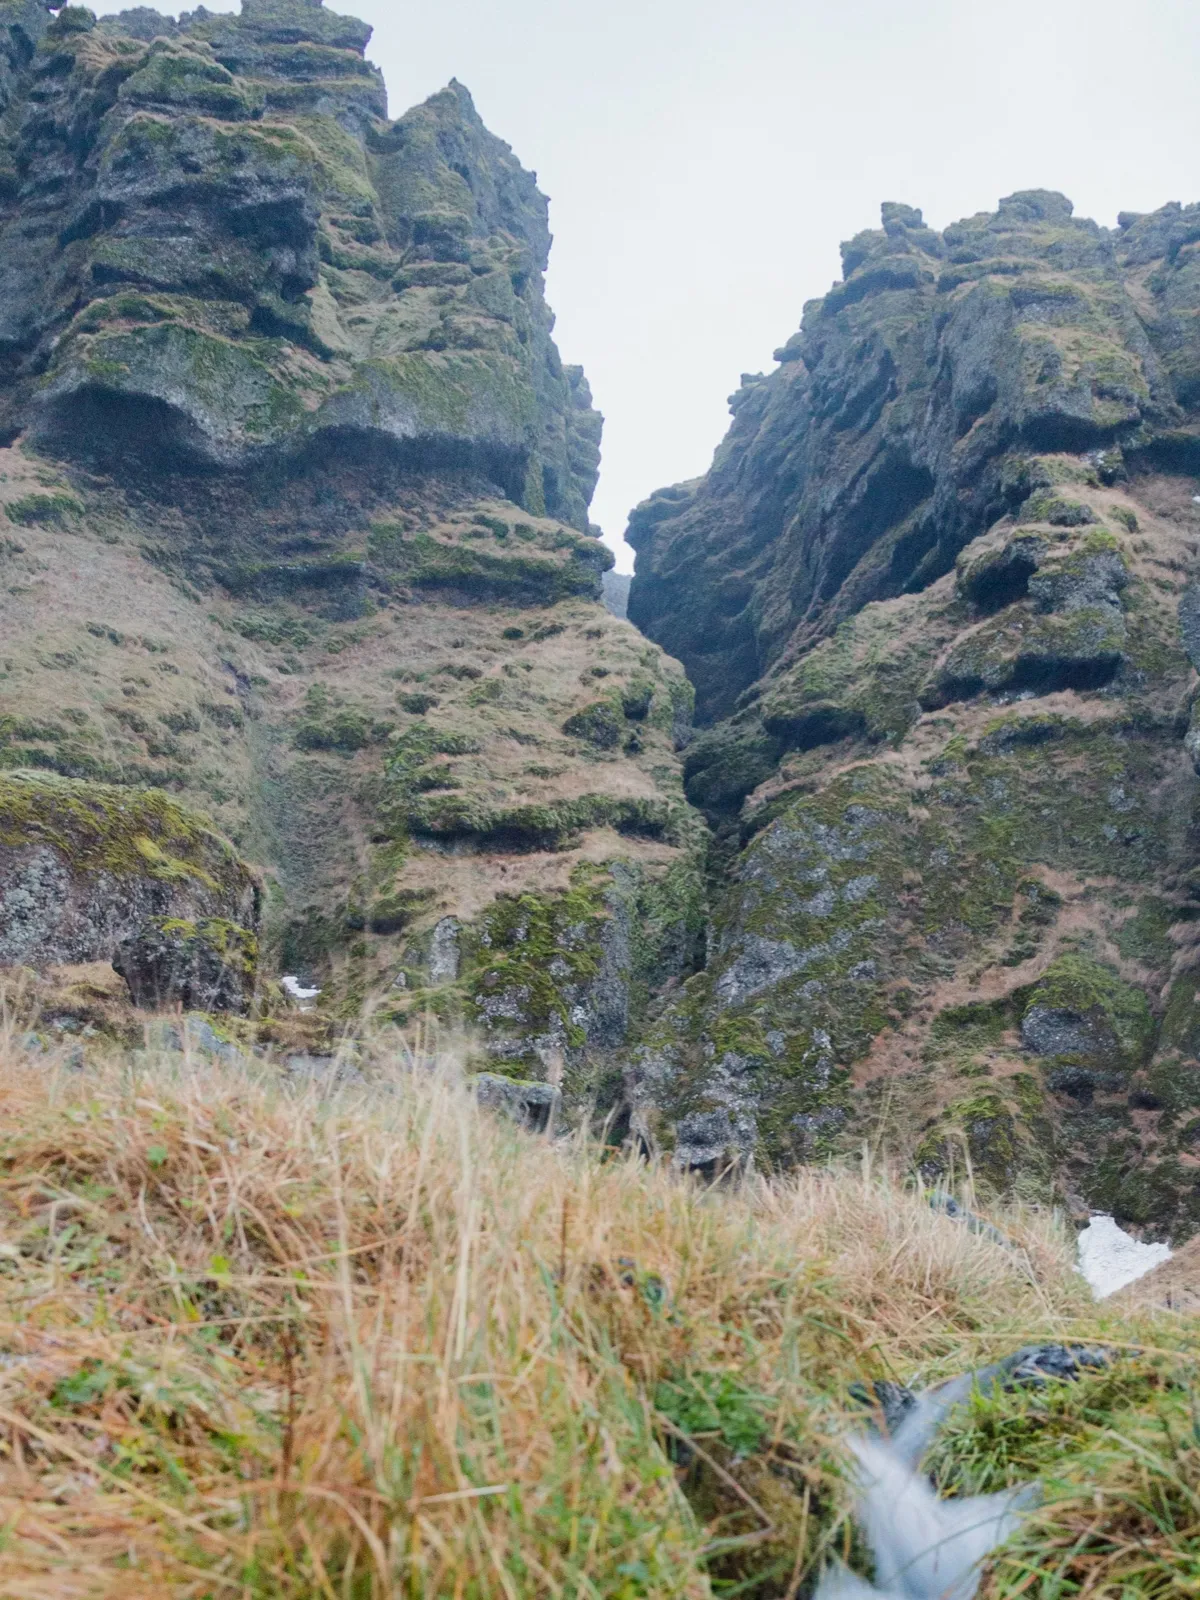
Look at the photograph above. The two rock walls narrow toward a gap near the centre. Their sloping edges create a route into that opening. The pale sky makes the gap easy to find.
Down at the bottom right, a small stream provides another possible entry point. But much of it disappears behind the foreground grass and rocks. It is not a clean, uninterrupted line from the corner to the distance.
That interruption is worth seeing. A scene can contain promising lines without giving you a tidy composition from every viewpoint. Moving a little, raising the camera or changing the bottom edge might make the route clearer. The photograph alone does not tell us whether another position was accessible, so that is a possibility to examine, rather than a claim about how the image was made.
Find the destination first
Before you look for a dramatic line, decide what should hold the viewer’s attention. It could be a person at the end of a path, a building beyond a street or the narrow opening of a canyon.
Then follow the line with your eyes. Does it arrive near that destination? Does it stop early? Does it pass the subject and send you into an empty corner?
There does not always need to be an object at the end. A bend that disappears into trees can make you curious about what lies beyond it. In that case, the route itself is the subject.
Change the starting point
Try a path or an everyday edge you can photograph comfortably. A pavement seam or table edge is enough; you do not need a mountain scene.
- Take one frame from your usual standing position.
- Shift to one side so the line enters from a lower corner. Keep the destination in view.
- Raise or lower the phone a little and make a third frame. Watch what overlaps the line in the foreground.
Compare the results. The corner entry may make the photograph feel deeper, but it can also exaggerate a dull foreground. A higher position may separate overlapping shapes. A lower one may make the line stronger while hiding its destination.
Choose the version in which the route is easiest to understand. You are testing a relationship between shapes, rather than looking for a universally correct camera height.
Use lines in ordinary subjects
At a table, a cutlery edge can point toward a dish. It helps only if the bright metal does not become more interesting than the food. Remove one piece and compare the frame.
For a product, the edge of a surface can introduce a direction. Check that it does not cross awkwardly through the object or leave it looking as though it is sliding out of the picture.
For a person, a wall or fence may lead toward them. Look for lines that appear to pass through their head. A small sideways move can separate the person from the background without changing the whole scene.
Watch for competing routes
A photograph can have too many lines doing different jobs. A railing leads left, a roofline leads right, and a bright cable cuts across the centre. Each may be clear on its own, but together they can make the subject harder to find.
Try changing one edge of the frame. If the photograph becomes easier to read when a line disappears, you probably did not need that line.
You can combine a leading line with the rule of thirds, but there is no need to force both into every picture. Start with a clear destination. BULB’s Landscape line guides illustrate the same idea in the camera preview: use the scene’s lines to lead toward a place you want the viewer to notice.